Order Page Settings
Here you can configure the checkout page so that it matches your needs and your business requirements. Let’s go over the available options and how to set them up.
Go to the menu section "Store Options - Checkout".
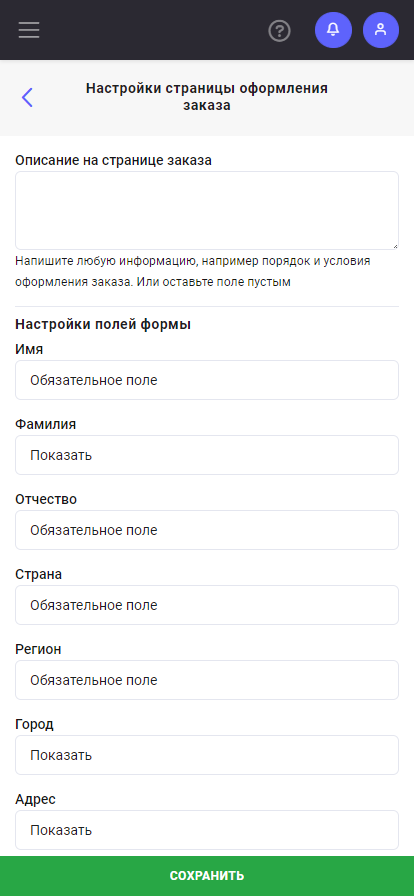
Checkout page setup:
Order page description: Here you can add any information that will be displayed on the checkout page. For example, you can specify the ordering process and terms, provide important instructions, or leave this field empty if no additional comments are needed.
Form field setup: You have full control over the fields that will be visible on the checkout page. You can hide unnecessary fields, make them required, or leave them optional depending on your needs. It is recommended to keep the "Phone" or "Email" fields required to ensure customer contact.
If you have shipping methods belonging to a specific zone, then the fields "Country" and "Region" should be left required.
Custom fields: In Mobitsa, you have the ability to add your own fields to the order form and configure them as you see fit. This allows you to make the ordering process more flexible and suited to your needs.
Click the "Add Field" button to create a new additional field in the order form.

If you need to collect a contact name, choose the "Name" field. To collect any text content, such as an address or an order comment, use the "Text" field. Don’t forget to set the text area height — for example, to 3 lines.
If you need to collect a phone number, choose the "Phone" field. To collect an email address, use the "Email" field. The "String" field is suitable for any text content that fits on one line.
If you want the site visitor to choose options from a dropdown list, use the "Dropdown" field. For example, to select a product color. In the field settings, enter each option on a new line.
If you want the site visitor to choose an option from a list without a dropdown, select the "Radio Button" field.
To choose a specific option, for example, "with delivery" or "need a box", use the "Checkbox" field. You can add multiple checkboxes to the form so the user can select several options.
If you need the site visitor to choose a date, use the "Date" field. For example, to select an appointment date for a consultation. If you need the site visitor to choose a time, use the "Time" field. For example, for a convenient time for a call.
For each field, you can set a title, such as "Your name" or "Phone number", and also add a hint so that site visitors can better understand what is required from them. You can also configure the text that will be displayed inside the field, for example, "Enter your name here".
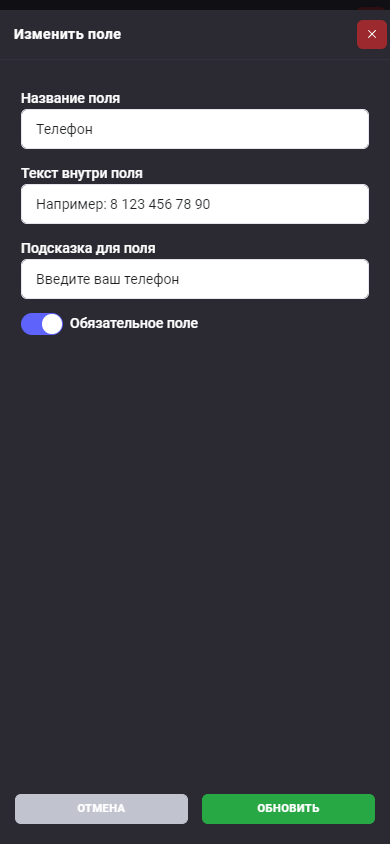
In addition, if you want site visitors to be required to fill in a specific form field, you can make it mandatory. This is very important if you want to receive accurate information from your visitors.
Consent to personal data processing: You can enable this option so that customers must confirm their consent to the privacy policy terms before placing an order. The privacy policy text can be configured in your site settings (Menu: Site Options - Miscellaneous).
Shipping settings: Here you can choose the country and region that will be set by default for users when placing an order. This will simplify the location selection process for customers and make it more convenient.
After configuring all parameters, don’t forget to save your changes. Now your checkout page will match your business processes and provide convenience for your customers.