Create/Edit Product
This guide will help you correctly add and configure a product in your online store. Let's get started!
Go to the "Store" menu section and select "Products". Then click the button, to add a new product.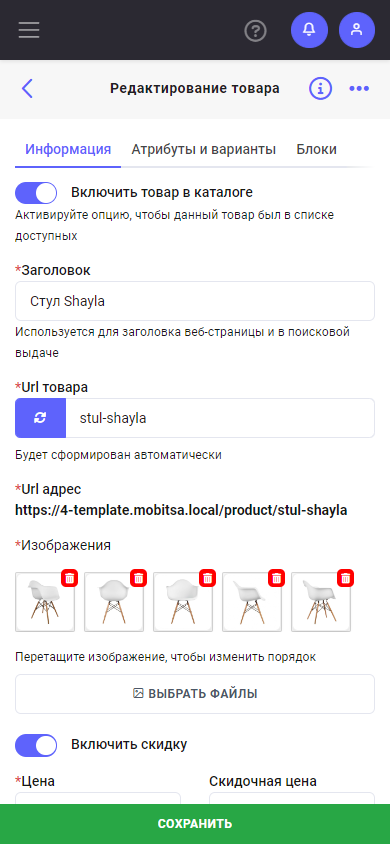
- "Include product in catalog": If you do not want your product to appear in the catalog, simply disable this option.
- Title: Required field. Enter the name of your product, which will be used in the page title and displayed in search results.
- Product URL: You can create your own URL, or it will be generated automatically.
- Images: Add product images. It is recommended to add several images to best showcase your product. You can change the order of the images simply by dragging them.
- Price and Discount price: Enter the base product price, and if necessary, also specify the discount price. If you want to enable a discount, activate the "Enable discount" option.
- Category: If necessary, select a product category. Make sure you have previously created the appropriate categories in the "Store" - "Categories" section. Click the button to add a new category.
- SKU: This is a unique code assigned to each product for accounting purposes within your company. Enter your SKU or let the system generate it automatically.
- Enable inventory management: If you want to track the number of products in stock, activate this option and enter the corresponding product quantity.
- Allow pre-order: This option is available when inventory management is enabled. Here you can allow pre-ordering of a product even if the stock quantity is below zero.
- Enable NEW sticker: This sticker will be displayed on your product, indicating that it is new.
- Product shipping: If your product does not require shipping, simply disable this option.
- Product weight (kg): Enter the product weight if the shipping cost depends on its weight.
- Product rating: The product rating stars will be displayed for customer review.
- Product description: Enter a detailed description of your product to provide complete information about it.
Attributes
In the "Attributes and variants" tab, you will find the following configuration options:
Attributes: Your attributes will be available in the dropdown list. Make sure you have previously added the needed attributes in the menu section "Store" - "Attributes".
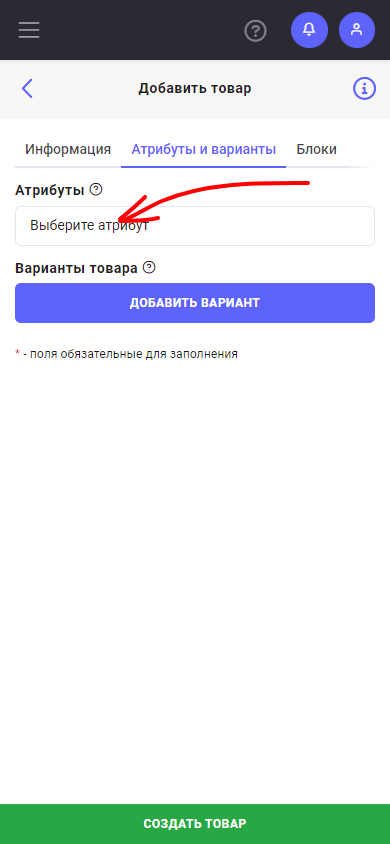
If you need a new attribute, you can also add it right here by selecting the "New attribute" option.
Attributes let you define additional product characteristics, such as size, color, etc. You can use these attributes to filter products in the store and to create product variants.
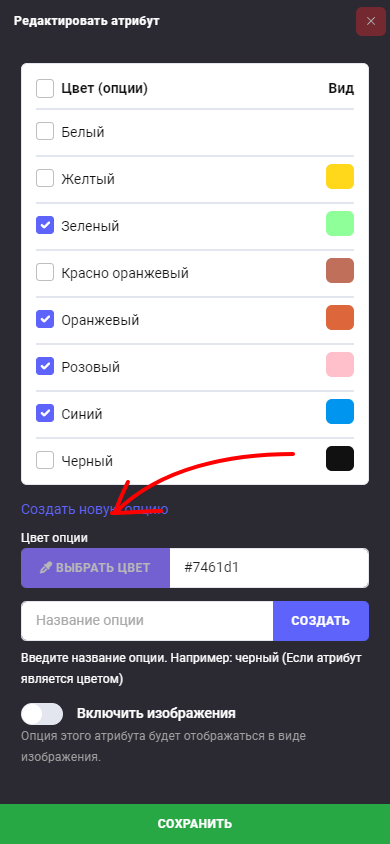
After adding an attribute, click it to select the available options. Please note that the options must be filled in within the attribute beforehand.
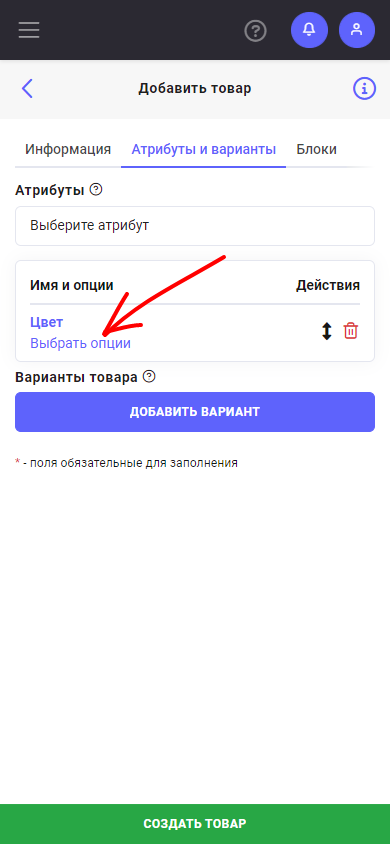
Select the required options, for example, the available colors for this product.
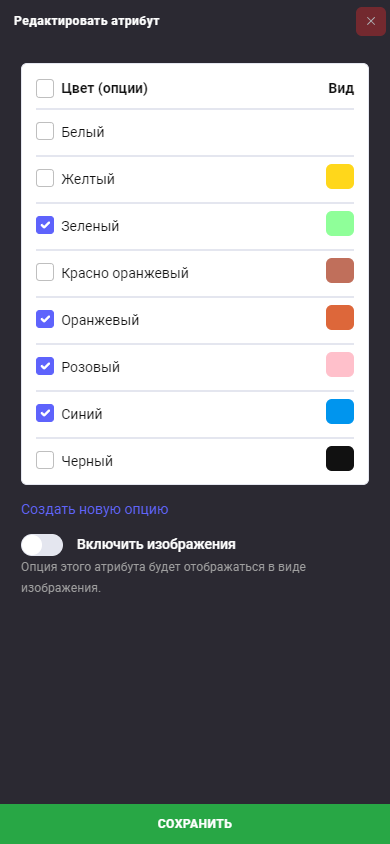
If needed, you can add a new attribute option right here. To do this, click "Create new option".
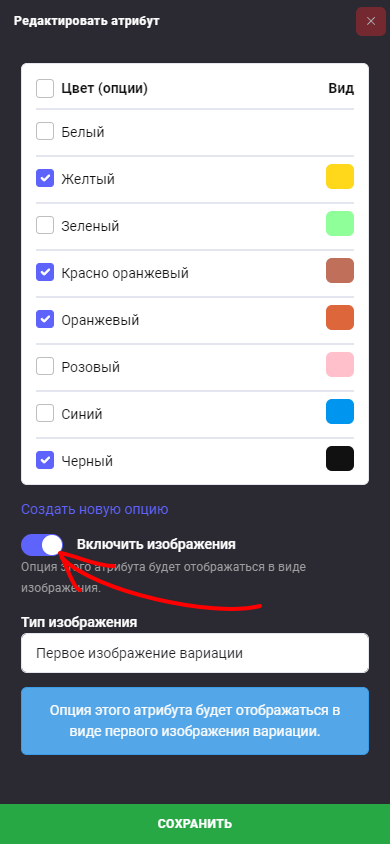
The "Enable images" option lets you assign images to options. If your product has variants, the user can select a specific product color by clicking the corresponding variant image.

You can choose the first variant image as the image. In this case, the variant image will be displayed dynamically depending on the options selected by the user.
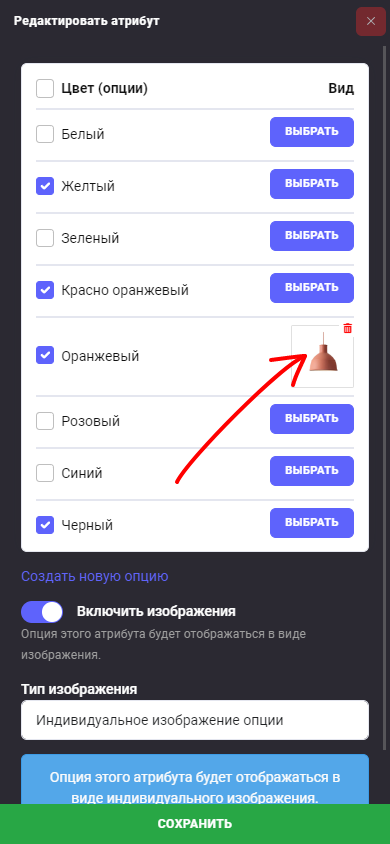
Or you can assign an individual image to each option. Click the "Select" button next to the option and choose images for each selected option.
After completing the settings, do not forget to save the changes by clicking the "Update" button.
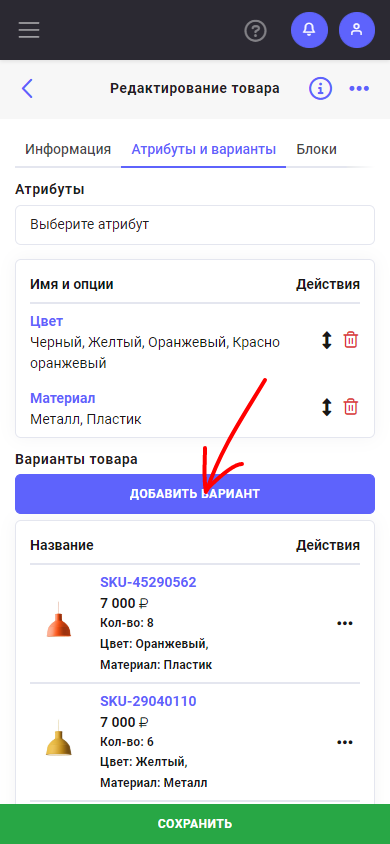
Product Variants
To add a product variant, click the "Add variant" button.
In the pop-up window, configure the following fields:
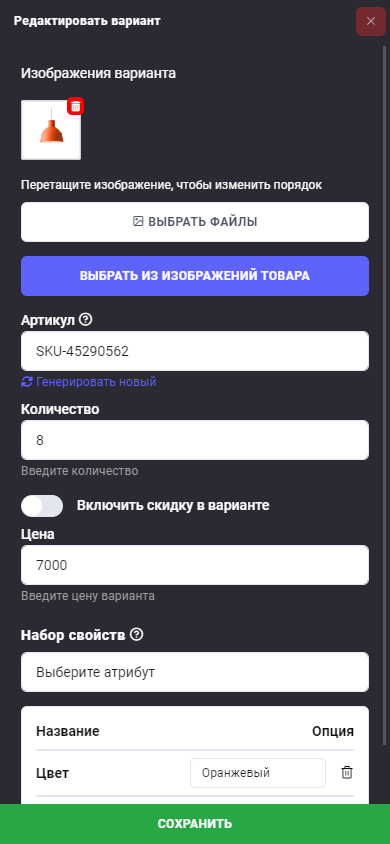
- Image: You can upload a new image or choose from already uploaded product images. To change the image order, simply drag them into the desired order.
- SKU: Enter the code that will be assigned to this product variant. If you do not want to enter it manually, the system can generate it automatically.
- Quantity: If you keep inventory records, specify the quantity for this variant.
- Price and Discount price: Enter the base price of the variant and, if necessary, the discount price. To enable the "Discount price" field, make sure the "Enable variant discount" option is activated.
- Property set: Assign unique properties for this variant, such as size or color. For example, you can set the property "Size" to "XL" and the property "Color" to "white". To do this, select the appropriate attribute from the list and choose the required option.
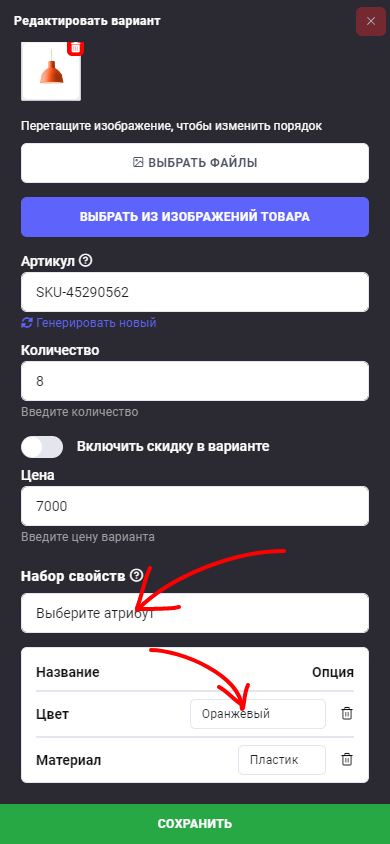
After completing the variant settings, do not forget to save the changes.
Create all available product variants so users can choose from them. Each variant can have its own unique characteristics, images, and prices. This will allow your customers to choose the best option that matches their preferences and requirements.
Blocks
In the "Blocks" tab, you can add absolutely any content to your product description using a set of blocks. If you need to create a unique product card design, this option will definitely come in handy.
Blocks let you customize the appearance of the product description, add images, text, video, buttons, and much more. You can use blocks to create a more attractive and informative product page, drawing customers' attention and providing them with useful information.
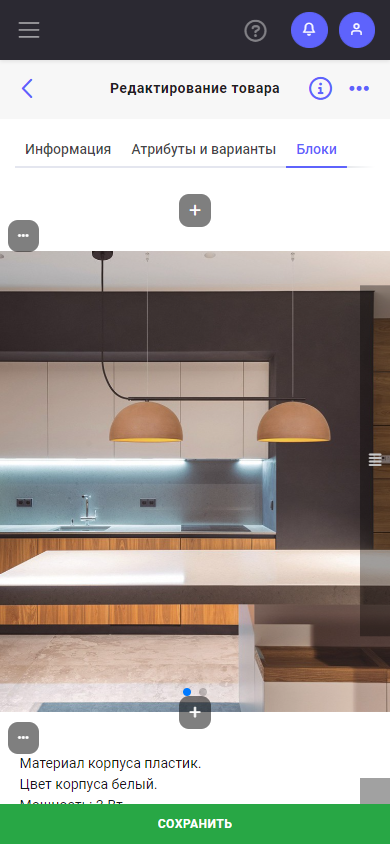
Examples of blocks you can add:
- Product image: You can add the main product image so it appears directly in the description. This will help customers get an idea of the product's appearance.
- Text block: Add a product description, its features, specifications, and other useful information. Use text formatting to make it more readable and appealing.
- Image gallery: Show various product images as a gallery so customers can better view it from all angles.
- Video: Embed a product video review or usage guide so customers can get a more complete understanding of the product.
Use different blocks to create an attractive and informative product page that helps customers make a purchase decision. Experiment with different block combinations and designs to achieve the best result.
After completing the settings, do not forget to save the changes
Conclusion
After completing all the steps above, you have successfully created and configured a product in your online store. Your product is now ready to be displayed on the website, and customers will be able to view it, choose variants, read the description, and make purchases.
Regularly update product information, add new products, track and analyze sales to optimize your assortment and attract more customers. We wish you success in your online store.