Block: Form
This block will help you collect contact details from your site visitors and even accept payments! Let's take a closer look at how this block works.
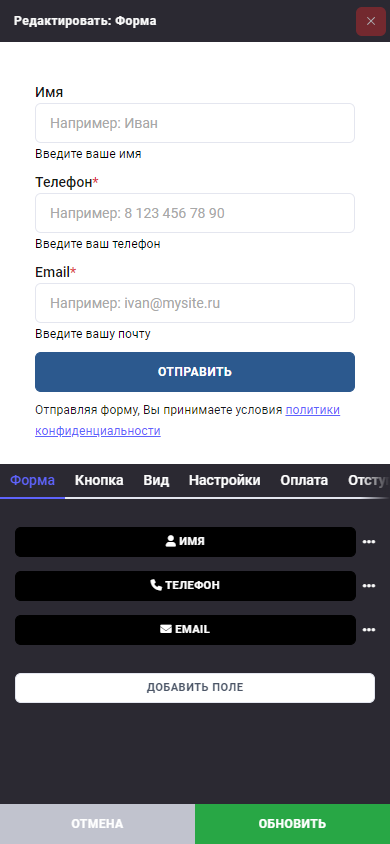
To get started with the block, go to the "Form" tab and add the required fields. Click the "Add field" button and choose the needed field type.
If you need to collect a contact name, choose the "Name" field. To collect any text content, such as an address or an order comment, use the "Text" field. Don't forget to adjust the height of the text field - for example, to 3 lines.
If you need to collect a phone number, choose the "Phone" field. To collect email, use the "Email" field. The "String" field is suitable for any text content that fits on one line.
If you want the site visitor to choose from a dropdown list, use the "Dropdown" field. For example, to choose a product color. In the field settings, enter each option on a new line.
If you want the site visitor to choose an option from a list without a dropdown, select the "Radio button" field.
To select a specific option, such as "with delivery" or "need a box", use the "Checkbox" field. You can add multiple checkboxes to the form so the user can choose several options.
If you need the site visitor to choose a date, use the "Date" field. For example, to choose an appointment date. If you need the site visitor to choose a time, use the "Time" field. For example, for a convenient call time.
For each field, you can set a label, for example, "Your name" or "Phone number", and also add a hint so that site visitors can better understand what is required of them. You can also set the text that will be displayed inside the field, for example, "Enter your name here".
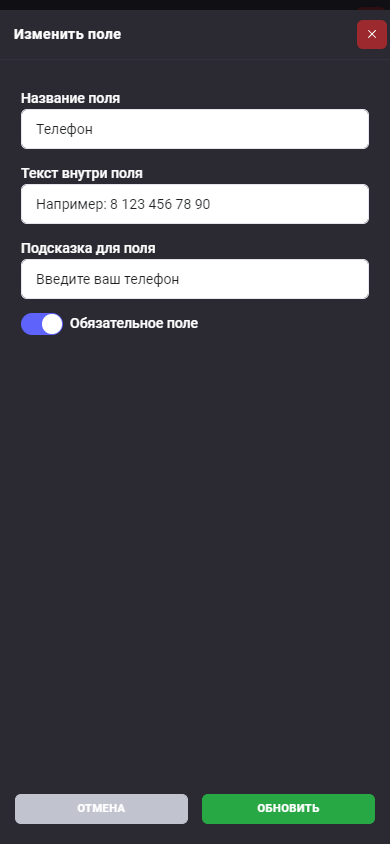
In addition, if you want site visitors to обязательно fill out a specific form field, you can make it required. This is very important if you want to get accurate information from your visitors.
Select the "Button" tab to customize the form button appearance. Click the button to edit it. If you need to adjust colors, fonts, and other parameters, refer to the help section "Detailed instructions - Button".
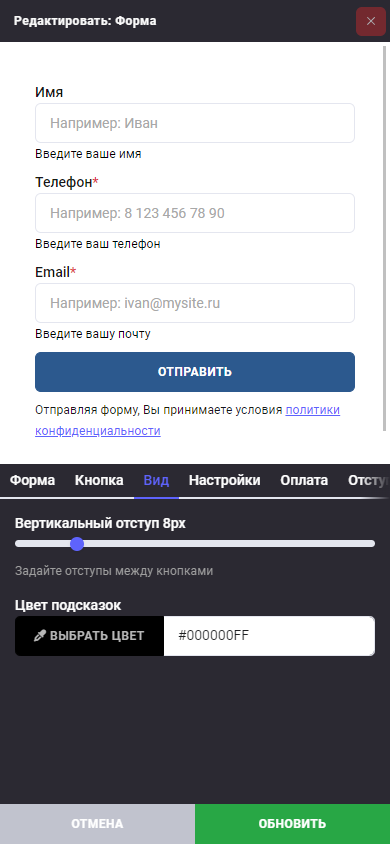
Then switch to the "Appearance" tab to set the vertical spacing of the form fields and the hint color. This will help make your form more readable and attractive.
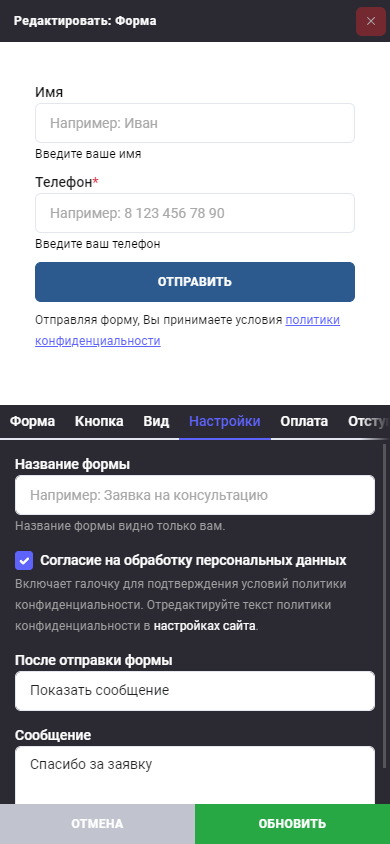
If you want to set a form name or enable the "Consent to personal data processing" checkbox, go to the "Settings" tab. Don't forget to add the "privacy policy" text in the "Site options - Other - Privacy Policy" section. In this tab, you can also choose what happens after the form is submitted: show a message, open a link, or open a page on your site.
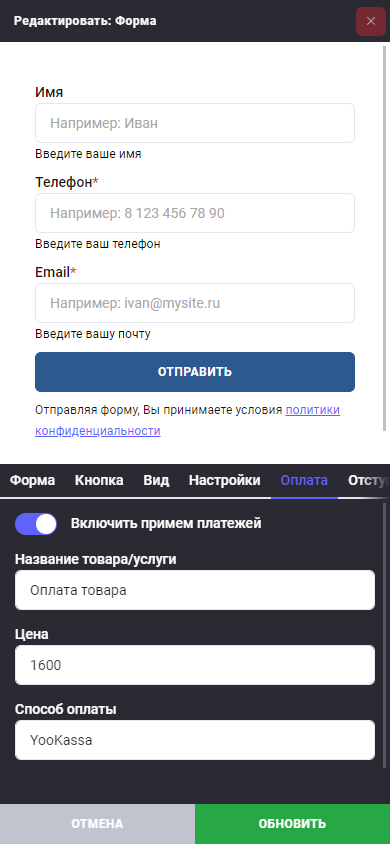
If you need to set up payments through the form, switch to the "Payment" tab. Enter the name of the product or service, the price, and choose a payment method that can be added in the "Store - Payment methods" section.