How to set up AI chat on your website
After connecting the AI agent to your website, you can separately configure the chat itself: how it looks, what the visitor sees first, how the chat opens, and how it behaves on the website. To find this section, open the required AI agent, go to the Connections tab, and select the Website channel. This article covers only the chat settings on the website. Connecting the website to the AI agent is a separate step.
What you can configure
- the chat window appearance;
- the first screen of an empty chat;
- the chat behavior on the website;
- the chat open button.
This is enough to make the chat clear, neat, and convenient for the visitor.
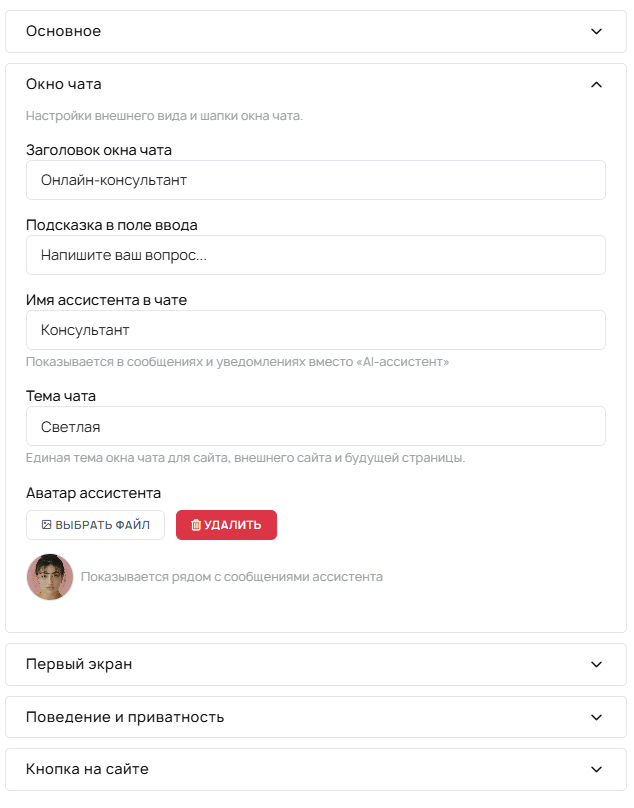
1. Fill in the main chat elements
First, open the required AI agent, go to the Connections tab, and select the Website channel. Then configure what the visitor sees immediately after opening the chat:
- the chat name;
- the input field hint;
- the assistant name;
- the avatar, if used;
- the theme.
It is better to make these elements clear and simple right away. The chat name and assistant name should make it clear what the chat is for and who is responding.
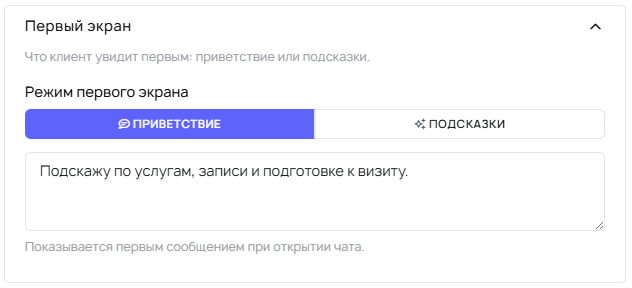
2. Configure the first screen
The first screen of an empty chat is what a person sees before the first message. Usually, one of two options is used here:
- welcome message — a short first message;
- ready-made prompts — options the visitor can use to start the conversation.
How to format a welcome message
- keep it short and to the point;
- explain the benefit for the visitor;
- avoid overly general promises.
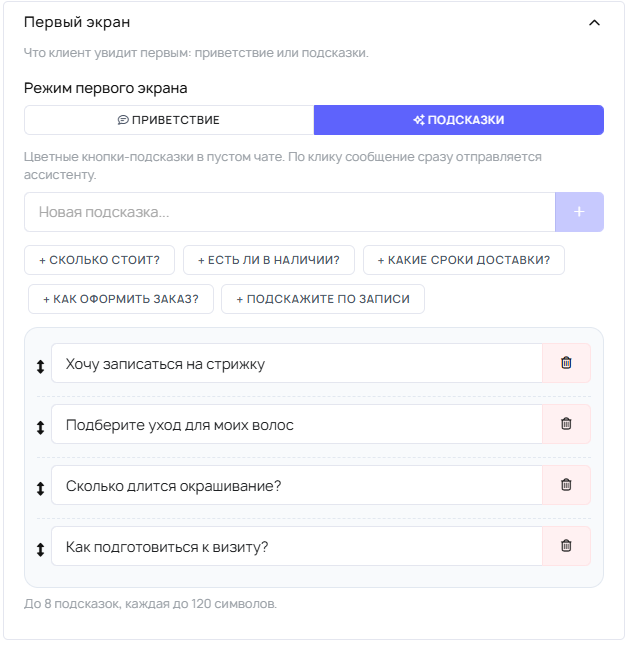
How to format ready-made prompts
- make them short and clear;
- offer only real conversation scenarios;
- do not promise what the AI agent cannot yet do.
If you want to launch the chat calmly, start with one clear option: either a welcome message or ready-made prompts.
3. Configure the chat behavior
Separately check how the chat behaves on the website. Usually, this is where you configure:
- consent for data processing, if needed;
- automatic opening;
- the delay before automatic opening.
At the start, it is better not to overcomplicate the scenario. If the website is just launching, first test the regular chat opening without being overly intrusive.
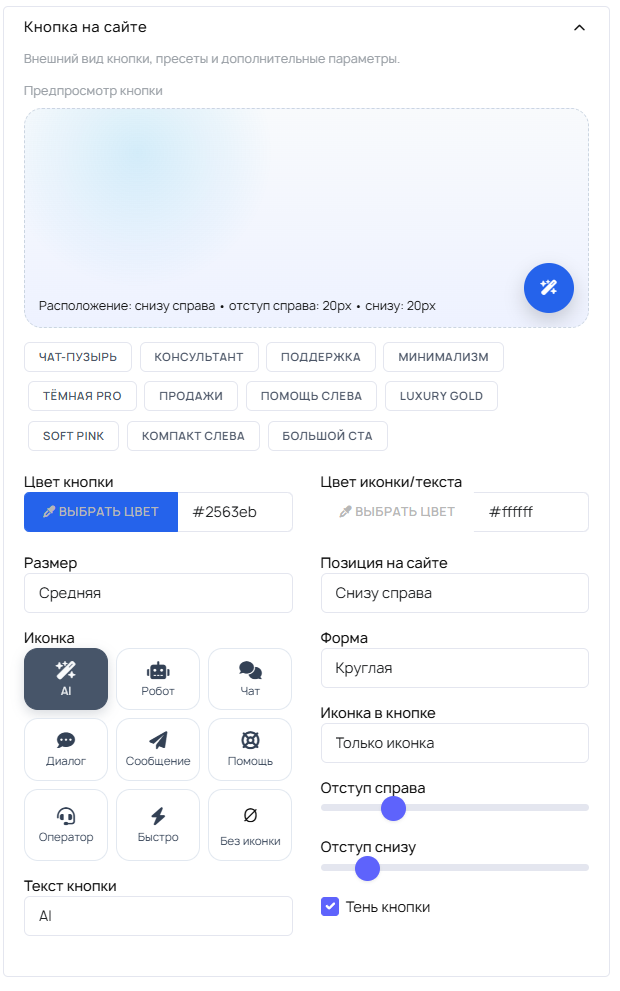
4. Configure the chat open button
The button should be noticeable, but not interfere with the website content. Usually, you change:
- the text;
- the color;
- the size;
- the shape;
- the icon;
- the position on the website;
- the spacing and shadow.
For the first launch, you do not need to change all parameters. It is enough that the button is easy to find and convenient to click.
5. Check the chat after setup
After saving the settings, open the website and check the chat through the visitor’s eyes.
- does the chat look clear;
- is the open button easy to notice;
- is the welcome message not too long;
- are the prompts for starting the conversation understandable;
- does the first screen promise anything the AI agent cannot yet do.
What to configure right away
- a clear chat name;
- a clear hint in the input field;
- a meaningful assistant name;
- a good first screen;
- a neat chat open button;
- consent for data processing, if needed.
What can be left for later
- perfect button styling;
- automatic opening;
- fine styling;
- a long set of prompts for starting the conversation.
It is better to launch the chat first, see how people use it, and only then refine the details.
What not to confuse
The first screen and the AI agent’s answers
The first screen is only the beginning of the conversation. It does not replace the AI agent’s real knowledge, skills, and settings.
The welcome message and ready-made prompts
The welcome message is a short introduction. Ready-made prompts are options the visitor can use to start the conversation.
The appearance and the AI agent’s capabilities
Even a neatly designed chat does not make the AI agent smarter. Answer quality depends on the knowledge base, skills, general settings, and the agent’s real capabilities.